MLOps: Workflow Orchestration with ZenML
 Isaac Kargar6 min read
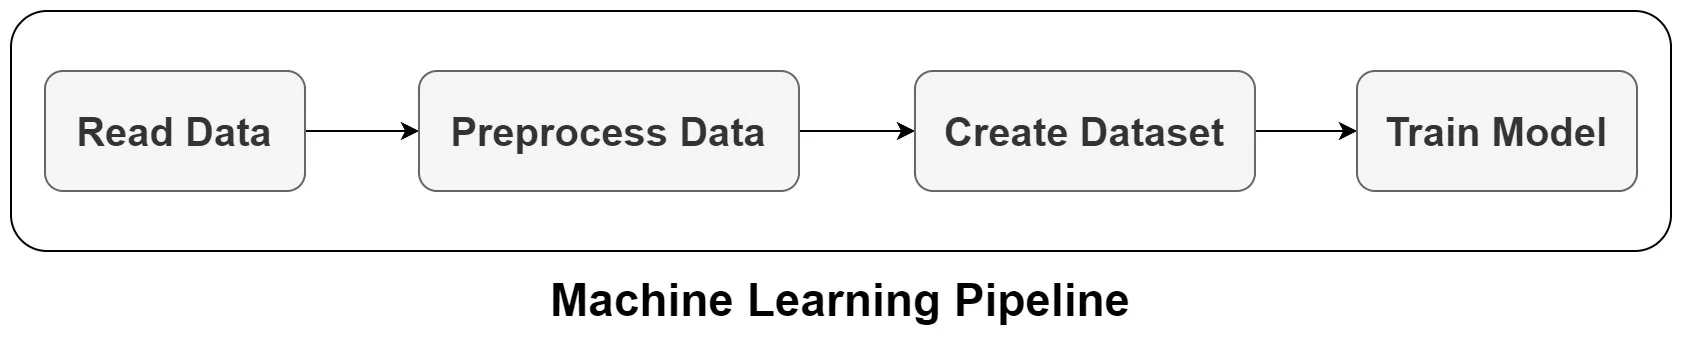
A machine-learning workflow usually contains data loading, preprocessing, training, evaluation, and artifact management. A workflow orchestrator records those steps and runs them in a controlled order. This post uses ZenML to express the workflow as a pipeline, first on a local stack and then as a cloud job.
The article uses ZenML 0.96.4 and Python 3.12. The ZenML installation guide lists the supported Python versions and current extras.
What ZenML adds
A ZenML pipeline is a graph of steps. A step is a Python function that ZenML can execute and whose returned objects become pipeline artifacts. The active stack supplies the infrastructure:
| Stack component | Responsibility |
|---|---|
| Orchestrator | Decides where and when pipeline steps execute |
| Artifact store | Persists datasets, models, and step outputs |
| Metadata store | Records pipeline runs, step state, and lineage |
| Experiment tracker | Records framework metrics and parameters when configured |
| Container registry | Stores images used by remote execution |
| Deployer | Runs a pipeline as a long-lived HTTP service when that is the chosen serving contract |
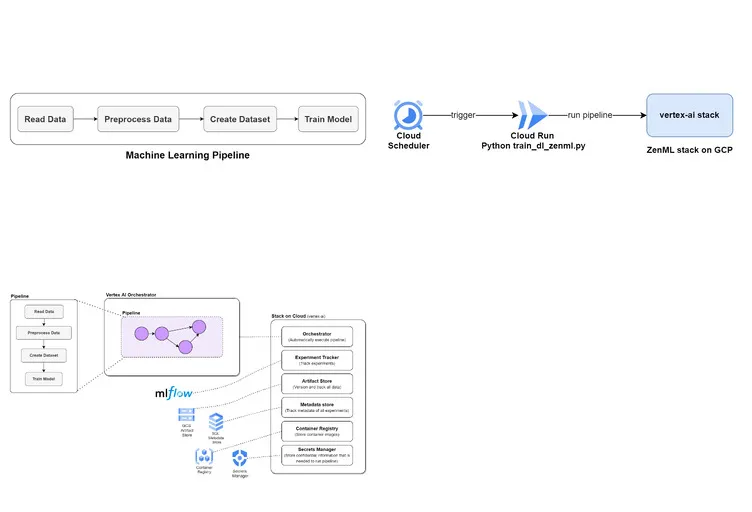
Every stack needs an orchestrator and an artifact store. A local stack is useful for development. A cloud stack can use object storage and a managed orchestrator, but it also needs identity, a registry, networking, secrets, and a central ZenML server. See Stacks and components.
Install one current local setup
Create a fresh environment and install the pinned example dependencies:
python3.12 -m venv .venv
source .venv/bin/activate
python -m pip install --upgrade pip
python -m pip install "zenml[local,server]==0.96.4" \
  pandas==2.2.3 scikit-learn==1.5.2
zenml init
zenml login --local
zenml version
zenml stack list
The local server provides the dashboard and metadata API. If you only need the local stack and not the dashboard, the local extra is sufficient. Keep the server and client versions aligned.
A reproducible training pipeline
The pipeline below uses the Iris dataset so it can run without a private file. It splits the data before fitting the vectorizer. The validation set is available for model selection, while the test set is kept for the final evaluation.
from __future__ import annotations

from typing import Tuple

import pandas as pd
from sklearn.datasets import load_iris
from sklearn.feature_extraction.text import TfidfVectorizer
from sklearn.linear_model import LogisticRegression
from sklearn.metrics import accuracy_score
from sklearn.model_selection import train_test_split
from zenml import pipeline, step


def normalize_label(label: int) -> str:
    return f"class-{label}"


@step
def load_data() -> pd.DataFrame:
    iris = load_iris(as_frame=True)
    data = iris.frame.rename(columns={"target": "label"})
    data["text"] = data.apply(
        lambda row: " ".join(
            [
                f"sepal-length-{row['sepal length (cm)']:.2f}",
                f"sepal-width-{row['sepal width (cm)']:.2f}",
                f"petal-length-{row['petal length (cm)']:.2f}",
                f"petal-width-{row['petal width (cm)']:.2f}",
            ]
        ),
        axis=1,
    )
    data["label"] = data["label"].map(normalize_label)
    return data[["text", "label"]]


@step
def split_data(
    data: pd.DataFrame,
    test_size: float = 0.2,
    random_state: int = 42,
) -> Tuple[pd.DataFrame, pd.DataFrame, pd.DataFrame]:
    train, holdout = train_test_split(
        data,
        test_size=test_size,
        random_state=random_state,
        stratify=data["label"],
    )
    validation, test = train_test_split(
        holdout,
        test_size=0.5,
        random_state=random_state,
        stratify=holdout["label"],
    )
    return (
        train.reset_index(drop=True),
        validation.reset_index(drop=True),
        test.reset_index(drop=True),
    )


@step
def train_model(
    train: pd.DataFrame,
    validation: pd.DataFrame,
) -> Tuple[TfidfVectorizer, LogisticRegression]:
    vectorizer = TfidfVectorizer(
        token_pattern=r"(?u)\b[a-zA-Z][a-zA-Z0-9.-]*\b"
    )
    X_train = vectorizer.fit_transform(train["text"])
    X_validation = vectorizer.transform(validation["text"])

    model = LogisticRegression(max_iter=500, random_state=42)
    model.fit(X_train, train["label"])
    validation_accuracy = accuracy_score(
        validation["label"],
        model.predict(X_validation),
    )
    print(f"validation accuracy: {validation_accuracy:.3f}")
    return vectorizer, model


@step
def evaluate_model(
    vectorizer: TfidfVectorizer,
    model: LogisticRegression,
    test: pd.DataFrame,
) -> float:
    X_test = vectorizer.transform(test["text"])
    accuracy = accuracy_score(test["label"], model.predict(X_test))
    print(f"test accuracy: {accuracy:.3f}")
    return float(accuracy)


@pipeline
def training_pipeline(
    test_size: float = 0.2,
    random_state: int = 42,
):
    data = load_data()
    train, validation, test = split_data(
        data,
        test_size=test_size,
        random_state=random_state,
    )
    vectorizer, model = train_model(train, validation)
    evaluate_model(vectorizer, model, test)


if __name__ == "__main__":
    training_pipeline(test_size=0.2, random_state=42)
Run the file after activating the local stack:
python run_pipeline.py
zenml pipeline list
zenml pipeline runs list
ZenML serializes returned objects in the active artifact store and records each step in the metadata store. The pipeline does not pass a fitted vectorizer to the next step through a process-global variable. It returns the vectorizer and model as outputs, so the evaluator can load them from the run.
The test-size and random-state arguments are used by split_data and are recorded as pipeline parameters. The regular expression uses the full alphabetic range. A different data source may need a time or group split instead of a random split; that choice belongs in the experiment record.
Add MLflow tracking
ZenML can connect a step to an existing MLflow tracking service. Install the integration and register a tracker on a stack that already has an orchestrator and artifact store:
zenml integration install mlflow -y
zenml experiment-tracker register mlflow_tracker --flavor=mlflow
zenml stack register local_mlflow \
  -o default \
  -a default \
  -e mlflow_tracker \
  --set
The current MLflow integration guide documents local and remote tracking settings. With a remote server, configure the tracking URI and authentication through a ZenML secret or the platform’s secret manager. Do not put a password or token in a stack screenshot or source file.
To enable the tracker for the training step, add the component name to the decorator and log through MLflow inside the step:
from typing import Tuple

import mlflow
import mlflow.sklearn
import pandas as pd
from sklearn.feature_extraction.text import TfidfVectorizer
from sklearn.linear_model import LogisticRegression
from sklearn.metrics import accuracy_score
from zenml import step


@step(experiment_tracker="mlflow_tracker")
def train_model_with_tracking(
    train: pd.DataFrame,
    validation: pd.DataFrame,
) -> Tuple[TfidfVectorizer, LogisticRegression]:
    vectorizer = TfidfVectorizer(
        token_pattern=r"(?u)\b[a-zA-Z][a-zA-Z0-9.-]*\b"
    )
    X_train = vectorizer.fit_transform(train["text"])
    X_validation = vectorizer.transform(validation["text"])

    model = LogisticRegression(max_iter=500, random_state=42)
    # ZenML owns the parent tracker run; this block records a nested MLflow run.
    with mlflow.start_run(nested=True):
        model.fit(X_train, train["label"])
        validation_accuracy = accuracy_score(
            validation["label"],
            model.predict(X_validation),
        )
        mlflow.log_param("random_state", 42)
        mlflow.log_metric("validation_accuracy", validation_accuracy)
        mlflow.sklearn.log_model(model, artifact_path="model")
    return vectorizer, model
The local stack can track the run in MLflow, while ZenML still records the step inputs and outputs. In a team stack, use a shared MLflow tracking server and a remote ZenML artifact store so workers can access the same artifacts.
Move the stack to cloud infrastructure
A cloud stack changes the execution components around the pipeline code. The step functions remain ordinary Python, but remote execution needs a central ZenML server and credentials.
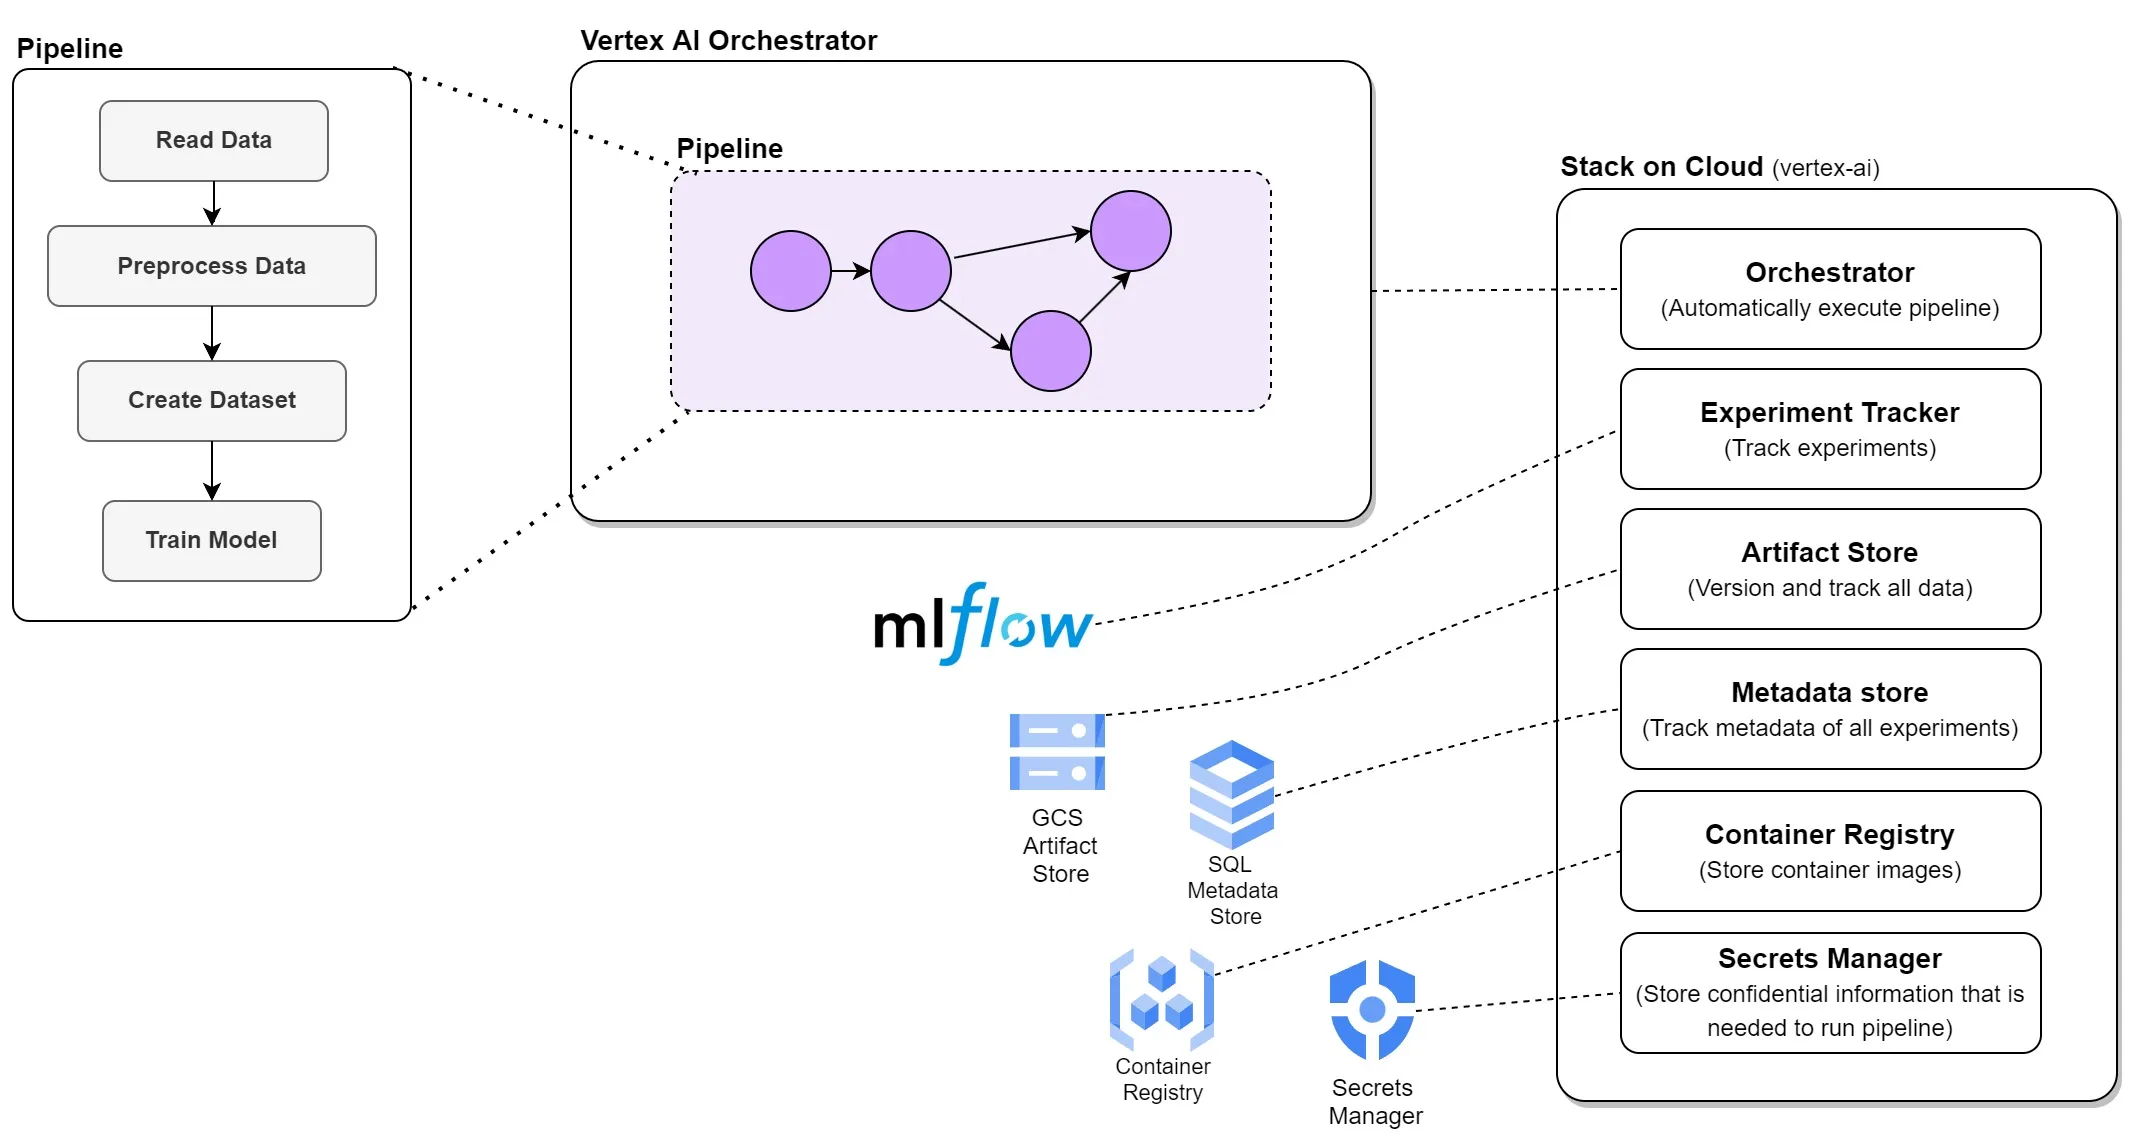
A typical configuration has these properties:
| Concern | Local example | Cloud configuration to decide |
|---|---|---|
| Orchestration | Local orchestrator | Vertex AI, Kubernetes, or another supported orchestrator |
| Artifacts | Local filesystem | GCS, S3, or another supported object store |
| Images | Local Python environment | A container registry and pinned image |
| Credentials | Local ADC or environment | A service connector or workload identity |
| Metadata | Local ZenML server | A central ZenML server reachable by clients and workers |
| Experiments | Optional local MLflow | Shared MLflow tracking URI and secret |
For Google Cloud, install the integration and register a GCS artifact store or Vertex orchestrator using the current GCP stack-component guides. Use Application Default Credentials locally or a ZenML GCP service connector. Resource names, bucket paths, service accounts, and project IDs belong in environment-specific configuration.
The model registry and model-deployer components are optional. ZenML’s current documentation is moving model-serving use cases toward pipeline deployments; see the pipeline deployment guide before choosing a serving boundary.
Run a terminating pipeline as a Cloud Run Job
A training pipeline that starts, writes artifacts, and exits is a batch job. If you package it for Google Cloud Run, use a Cloud Run Job. A Cloud Run service is an HTTP server and is appropriate only when the application needs a request endpoint.
The command below shows the Cloud Run Job boundary rather than a complete cloud deployment. Before using it, build an image that contains run_pipeline.py and the pinned dependencies from the local example, configure a remote ZenML server and stack, and grant the job identity access to that server and its artifact store. The local zenml login --local session cannot be used by a remote job. The server URL and any credentials should come from the deployment’s secret or connector configuration.
export PROJECT_ID="YOUR_GCP_PROJECT"
export REGION="europe-west1"
export REPOSITORY="mlops"
export IMAGE_URI="$REGION-docker.pkg.dev/$PROJECT_ID/$REPOSITORY/zenml-training:latest"
export RUNTIME_SERVICE_ACCOUNT="zenml-training@${PROJECT_ID}.iam.gserviceaccount.com"

gcloud builds submit --tag "$IMAGE_URI"

gcloud run jobs deploy zenml-training \
  --image="$IMAGE_URI" \
  --region="$REGION" \
  --project="$PROJECT_ID" \
  --service-account="$RUNTIME_SERVICE_ACCOUNT"

gcloud run jobs execute zenml-training \
  --region="$REGION" \
  --project="$PROJECT_ID" \
  --wait
The runtime service account must have access to the remote ZenML server, artifact store, registry, and any data sources. The job’s logs and the ZenML run record show whether the training completed. A separate Cloud Scheduler trigger can start the job on a cadence; it does not turn the job into an HTTP service. Validate the server, stack, image, secret, and IAM configuration in the target project before scheduling runs.
For a long-lived HTTP pipeline deployment, use a configured ZenML Deployer and follow the GCP Cloud Run deployer guide. That path is a different execution contract from the terminating training job above.
What to verify
Before treating a remote run as reproducible, check the following in the run metadata:
- the data source and split boundaries;
- the test-size and random-state values;
- the dependency and image versions;
- the model and preprocessing artifacts;
- the runtime identity and artifact-store path;
- the validation result used for selection and the final test result.
This makes the pipeline useful for repeated training while keeping the infrastructure choice explicit.
Work with Nazmi
Build your AI system with Nazmi.
Tell us what you are building, what exists today, and where your team needs help.
Start a conversation or book a 20-minute call →