Data Engineering — Week 1: Introduction and Prerequisites
Week 1 — Data Engineering Zoomcamp course: Introduction & Prerequisites
The goal of this course is to build a data pipeline around a dataset like TLC Trip Record Data which is about pickups and drop-offs in New York City.
You can find other posts of this series:
- Data Engineering — Week 2a — Week 2 — Data Engineering Zoomcamp course: Data ingestion
- Data Engineering — Week 2b — We talked about data ingestion and Airflow in the previous blog post. Let’s continue with the second one here.
- Data Engineering — Week 3a — Week 3 — Data Engineering Zoomcamp course: Data Warehouse
- Data Engineering — Week 3b — Week 3 — Data Engineering Zoomcamp course: Data Warehouse
- Data Engineering — Week 4 — Week 4 — Data Engineering Zoomcamp course: Analytics Engineering
Here is the architecture of what we want to do in this course:
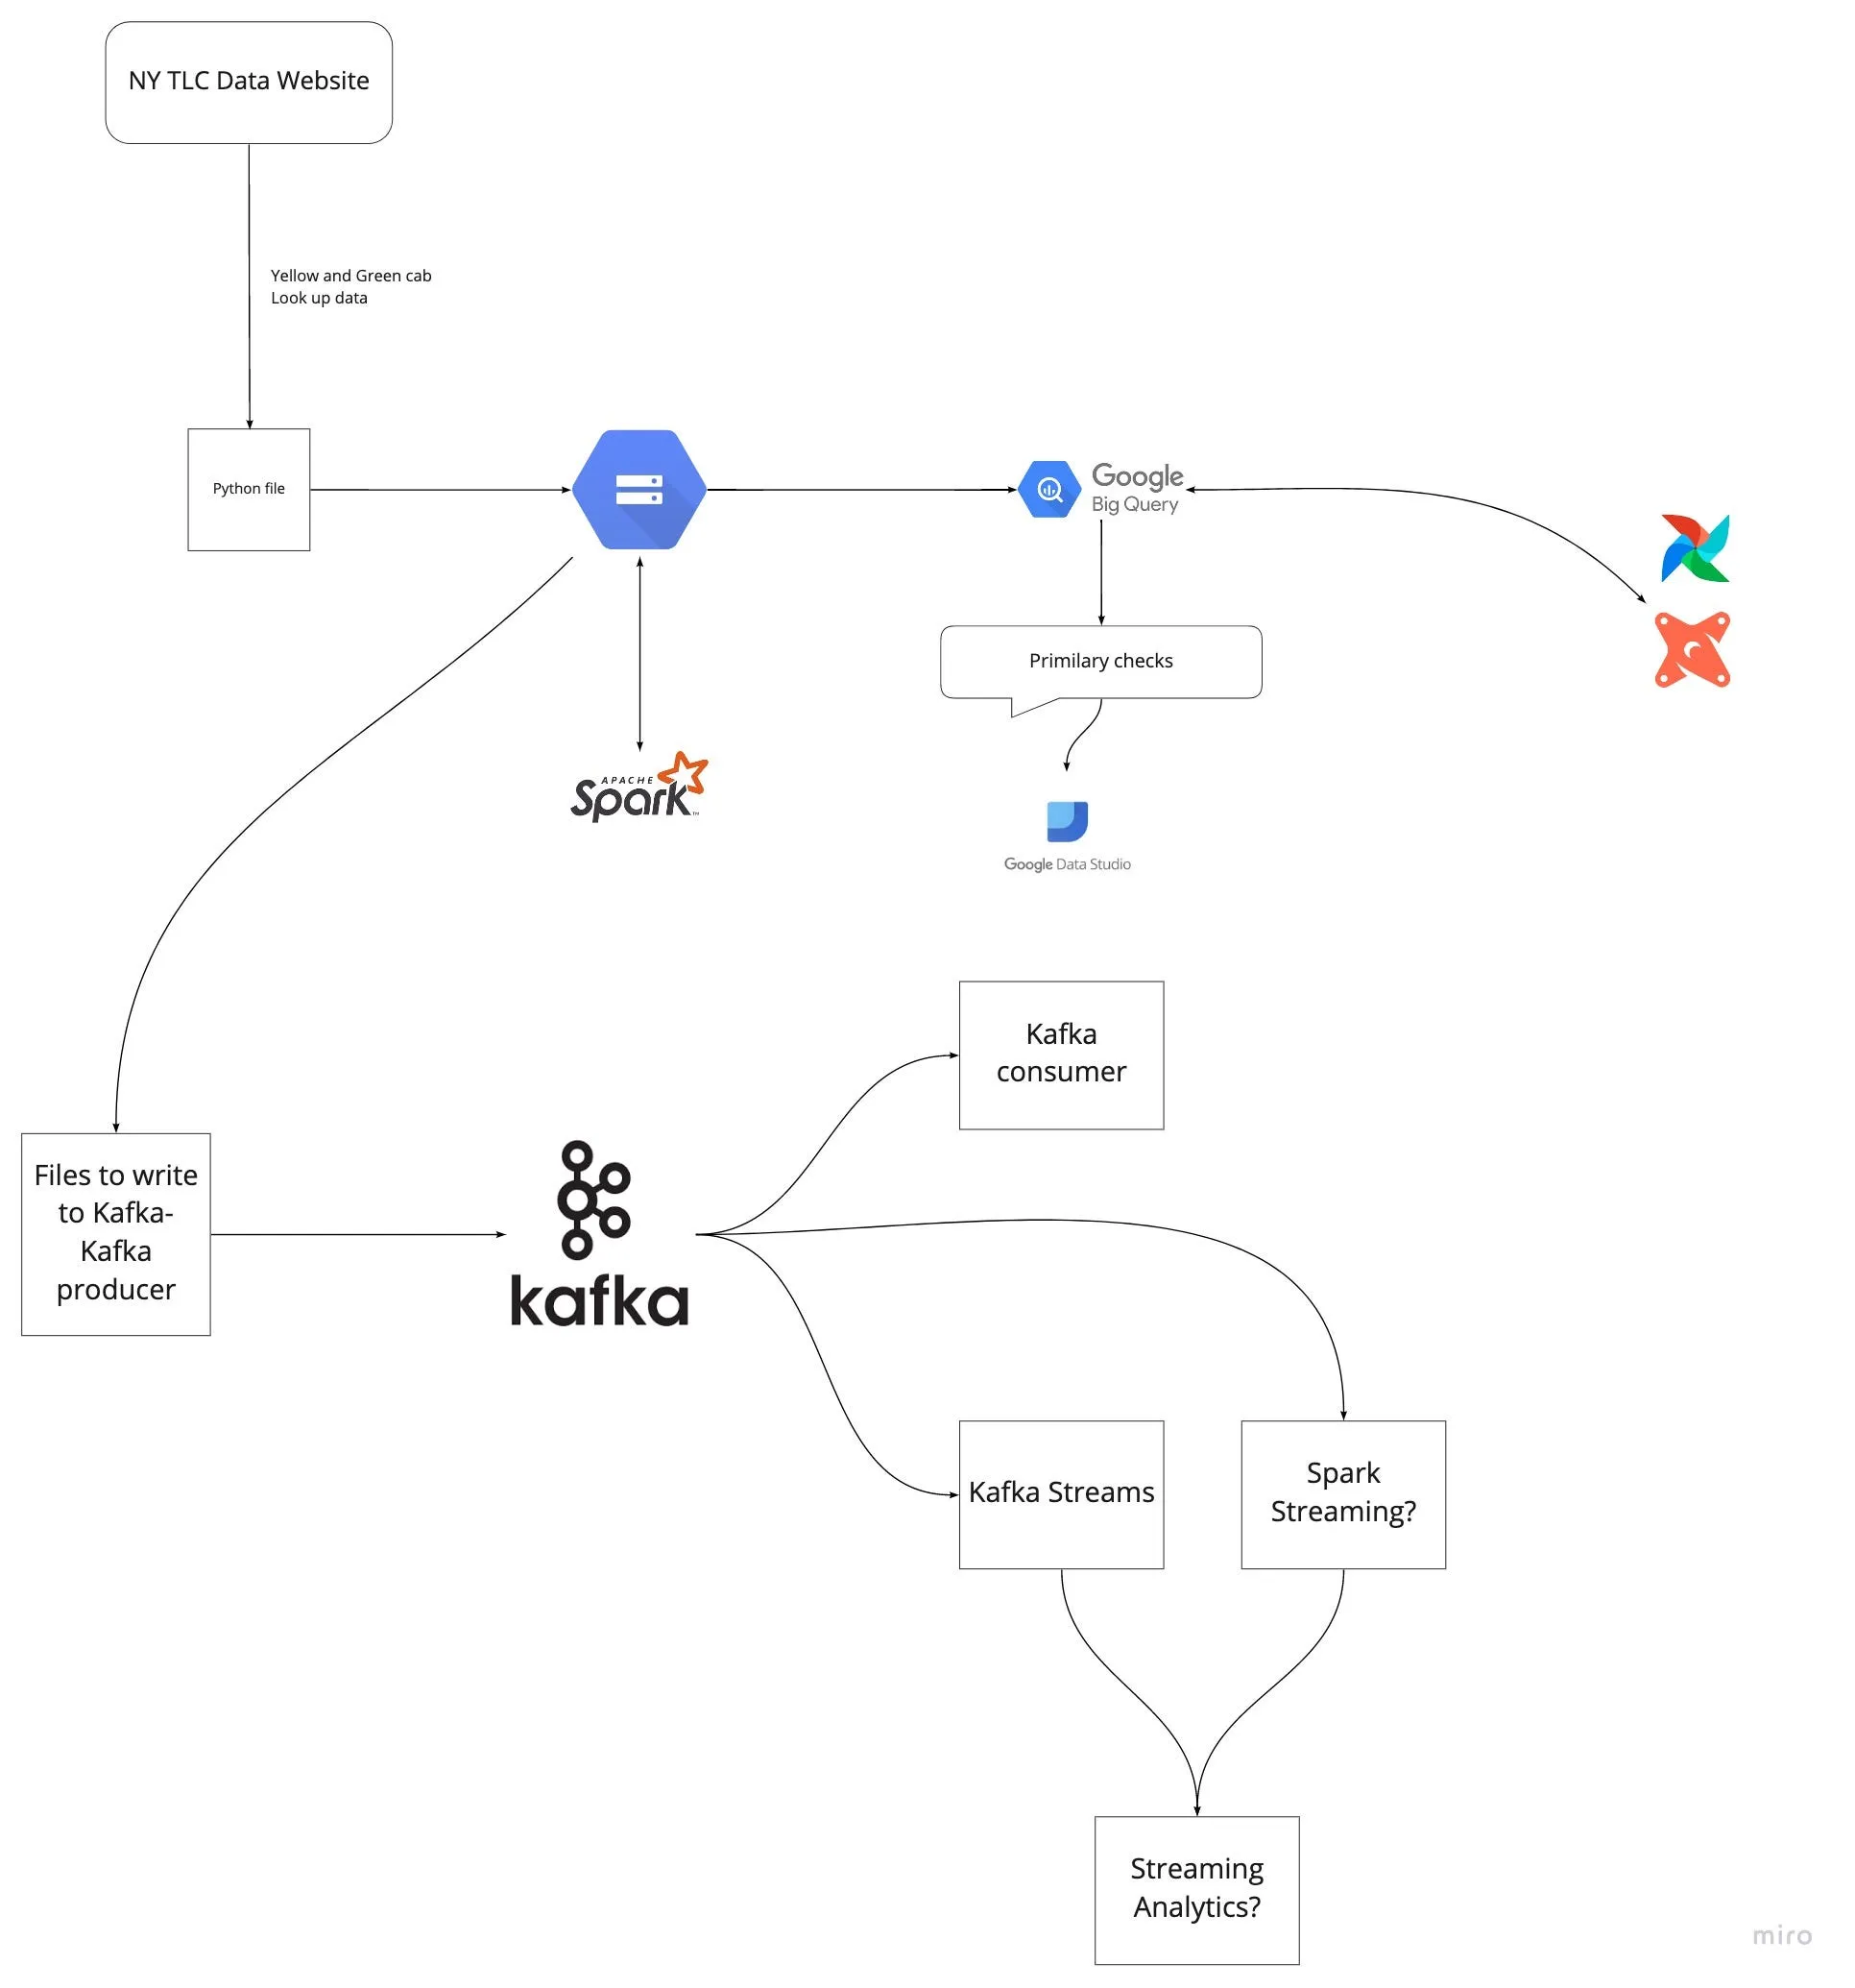
We will take this data, process it, then upload it into Google cloud storage, and then from there we will upload it to Google BigQuery, and then we will use BigQuery to do Analytics engineering and building transformation using spark and so on. In the other part, we will pretend that this data is coming in real-time and we will build a system around processing this data using Kafka.
Here is the list of technologists that will be used in this course:
- Google Cloud Platform (GCP): Cloud-based auto-scaling platform by Google
- Google Cloud Storage (GCS): Data Lake
- BigQuery: Data Warehouse
- Terraform: Infrastructure-as-Code (IaC)
- Docker: Containerization
- SQL: Data Analysis & Exploration
- Airflow: Pipeline Orchestration
- DBT: Data Transformation
- Spark: Distributed Processing
- Kafka: Streaming
The course will be around 10 weeks:
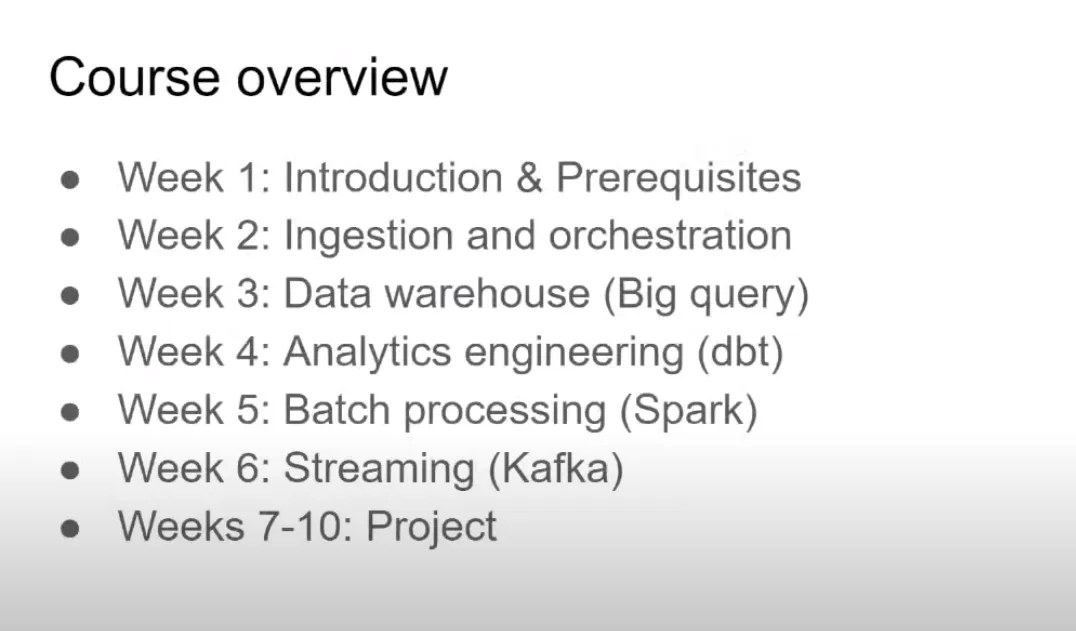
Here is the video for this week, which will introduce the teachers of the course and give an overview of what you can expect from the course each week:
Note: You can also find the GitHub repository for the course here.
Note: You can also find the playlist of videos of the course here.
In the first week, we will cover the following topics:
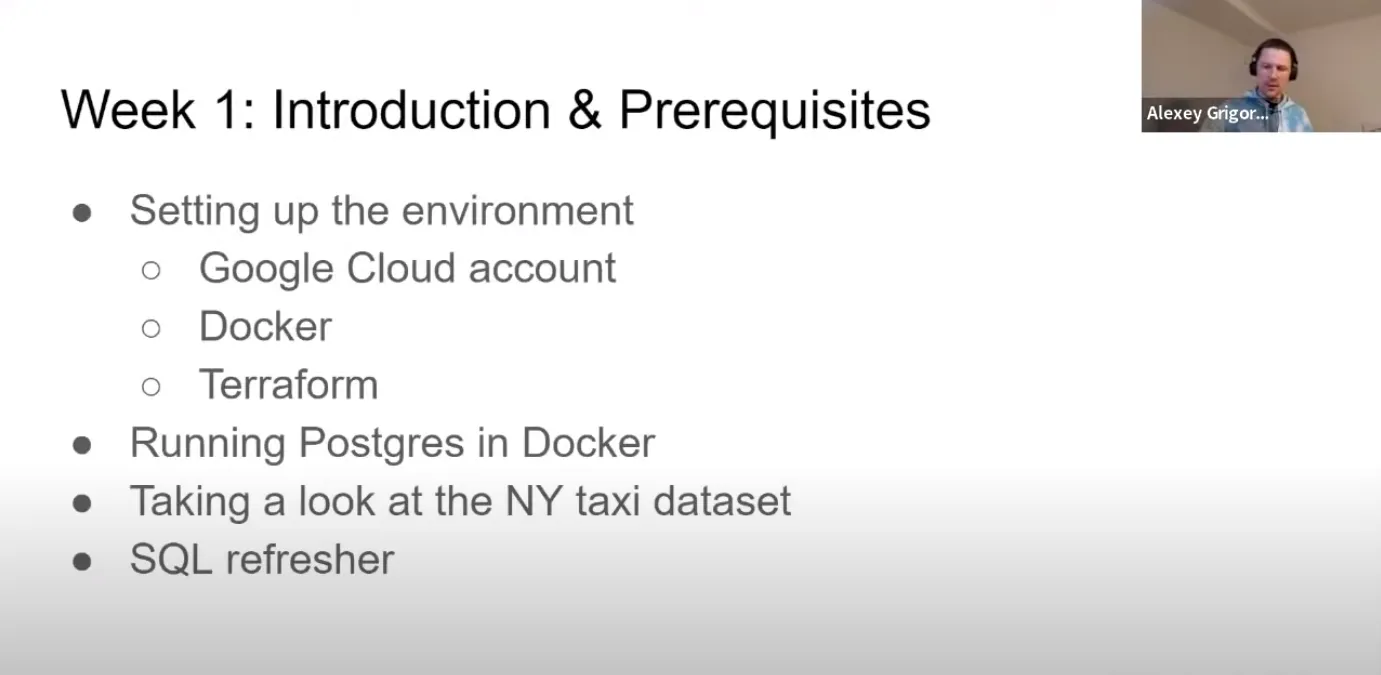
Let’s get started.
Google Cloud Platform
We will use some services from the Google Cloud Platform (GCP). Here is a very short introduction to its services:
First, you need to create a new account on google cloud. You can also use your account if you have one, but with a new account, you will get 300 dollars credits for free. Will see more on GCP in the next sections.
Docker
Docker is a set of platform-as-a-service products that use OS-level virtualization to deliver software in packages called containers. Containers are isolated from one another and bundle their own software, libraries, and configuration files; they can communicate with each other through well-defined channels [wikipedia].
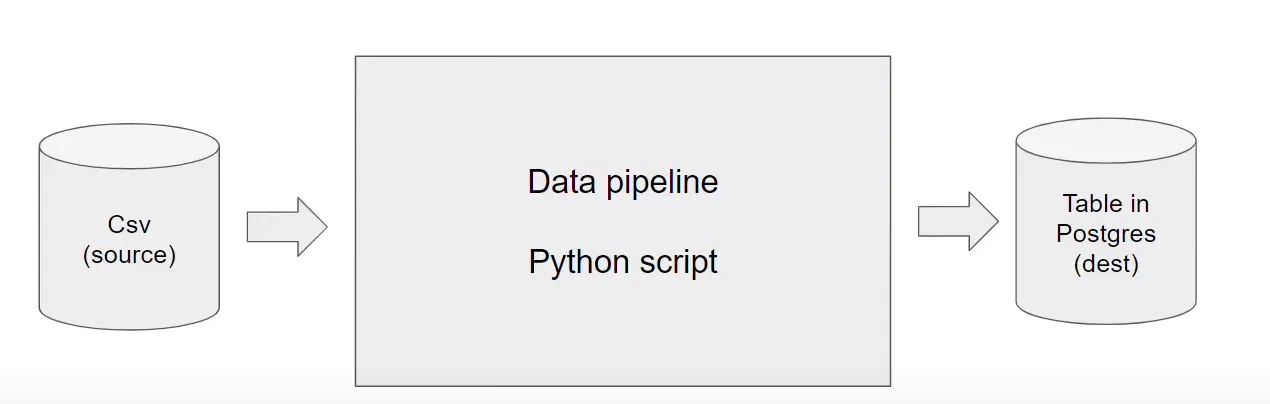
The main goal is to get data (in CSV format for example) and process it and then push it into Postgres database:
Let’s write a Dockerfile and build an image to run a simple python script:
# pipeline.py

import sys
import pandas as pd
print(sys.argv)
day = sys.argv[1]
# some fancy stuff with pandas

print(f'job finished successfully for day = {day}')
# Dockerfile
FROM python:3.9.1 #the base image to start from
RUN pip install pandas #run a command to install python packages
WORKDIR /app #change the working directory - it's like cd command in linux
COPY pipeline.py pipeline.py # copy the file from current folder in the host machine to the working directory
ENTRYPOINT [ "python", "pipeline.py" ] # run the python pipeline.py command when we use docker run commanduse the following command to build the image from Dockerfile in the current directory
docker build -t test:pandas .PostgreSQL
PostgreSQL, also known as Postgres, is a free and open-source relational database management system emphasizing extensibility and SQL compliance [wikipedia].
Now let’s see how we can run a PostgreSQL database with Docker and push some data into that.
Run postgres:13 image database with some environment commands (specified by -e), mapping the local folder from the host machine to a path in the docker container (using -v flag), and on port 5432 which will be used for connecting to the database from outside (our python code for example).
docker run -it \
 -e POSTGRES_USER="root" \
 -e POSTGRES_PASSWORD="****" \
 -e POSTGRES_DB="ny_taxi" \
 -v $(pwd)/ny_taxi_postgres_data:/var/lib/postgresql/data \
 -p 5432:5432 \
 postgres:13
Download data from here and under 2021 > January > Yellow Taxi Trip Records. The file name is yellow_tripdata_2021-01.csv.
Using the following codes you can load and visualize and import data to Postgres.
# import libraries
import pandas as pd
from sqlalchemy import create_engine

# create engine and set the root as ************************************/database
engine = create_engine('*************************************/ny_taxi')

df_iter = pd.read_csv('yellow_tripdata_2021-01.csv', iterator=True, chunksize=100000)

while True: #iterate and read chunks of data and append it to the table
    df = next(df_iter)
    df.tpep_pickup_datetime = pd.to_datetime(df.tpep_pickup_datetime)
    df.tpep_dropoff_datetime = pd.to_datetime(df.tpep_dropoff_datetime)
    df.to_sql(name='yellow_taxi_data', con=engine, if_exists='append')
Then we need to connect to the Postgres database. pgcli is a python package and a command line interface to quickly look at data and we can use it for connecting to the database and doing whatever we want with the data.
pip install pgclipgcli -h localhost -p 5432 -u root -d ny_taxiThen using \dt command, we can list tables of the database.
Use \d yellow_taxi_data command to see the imported data schema:
+-----------------------+-----------------------------+-----------+
| Column                | Type                        | Modifiers |
|-----------------------|-----------------------------|-----------|
| index                 | bigint                      |           |
| VendorID              | bigint                      |           |
| tpep_pickup_datetime  | timestamp without time zone |           |
| tpep_dropoff_datetime | timestamp without time zone |           |
| passenger_count       | bigint                      |           |
| trip_distance         | double precision            |           |
| RatecodeID            | bigint                      |           |
| store_and_fwd_flag    | text                        |           |
| PULocationID          | bigint                      |           |
| DOLocationID          | bigint                      |           |
| payment_type          | bigint                      |           |
| fare_amount           | double precision            |           |
| extra                 | double precision            |           |
| mta_tax               | double precision            |           |
| tip_amount            | double precision            |           |
| tolls_amount          | double precision            |           |
| improvement_surcharge | double precision            |           |
| total_amount          | double precision            |           |
| congestion_surcharge  | double precision            |           |
We can also write any query on imported tables in the database. For example:
root@localhost:ny_taxi> SELECT max(tpep_pickup_datetime), min(tpep_pickup_datetime), max(total_amount
 ) FROM yellow_taxi_data;
+---------------------+---------------------+---------+
| max                 | min                 | max     |
|---------------------|---------------------|---------|
| 2021-02-22 16:52:16 | 2008-12-31 23:05:14 | 7661.28 |
+---------------------+---------------------+---------+
SELECT 1
Time: 0.204s
Now let’s write our data ingestion pipeline to download the data and put it into Postgres and then dockerize it.
here is the ingest_data.py file:
#!/usr/bin/env python
# coding: utf-8

import os
import argparse

from time import time

import pandas as pd
from sqlalchemy import create_engine

def main(params):
    user = params.user
    password = params.password
    host = params.host
    port = params.port
    db = params.db
    table_name = params.table_name
    url = params.url
    csv_name = 'output.csv'

    os.system(f"wget {url} -O {csv_name}")

    engine = create_engine(f'********************************************/{db}')

    df_iter = pd.read_csv(csv_name, iterator=True, chunksize=100000)

    df = next(df_iter)

    df.tpep_pickup_datetime = pd.to_datetime(df.tpep_pickup_datetime)
    df.tpep_dropoff_datetime = pd.to_datetime(df.tpep_dropoff_datetime)

    df.head(n=0).to_sql(name=table_name, con=engine, if_exists='replace')

    df.to_sql(name=table_name, con=engine, if_exists='append')

    while True:
        t_start = time()

        df = next(df_iter)

        df.tpep_pickup_datetime = pd.to_datetime(df.tpep_pickup_datetime)
        df.tpep_dropoff_datetime = pd.to_datetime(df.tpep_dropoff_datetime)

        df.to_sql(name=table_name, con=engine, if_exists='append')

        t_end = time()

        print('inserted another chunk, took %.3f second' % (t_end - t_start))

if __name__ == '__main__':
    parser = argparse.ArgumentParser(description='Ingest CSV data to Postgres')

    parser.add_argument('--user', help='user name for postgres')
    parser.add_argument('--password', help='password for postgres')
    parser.add_argument('--host', help='host for postgres')
    parser.add_argument('--port', help='port for postgres')
    parser.add_argument('--db', help='database name for postgres')
    parser.add_argument('--table_name', help='name of the table where we will write the results to')
    parser.add_argument('--url', help='url of the csv file')

    args = parser.parse_args()

    main(args)
And now we can write a docker file for data ingestion:
FROM python:3.9.1

RUN apt-get install wget
RUN pip install pandas sqlalchemy psycopg2

WORKDIR /app
COPY ingest_data.py ingest_data.py

ENTRYPOINT [ "python", "ingest_data.py" ]
docker build -t taxi_ingest:v001 .You can check the following video to learn more about how to use Jupiter and connect to pgcli:
PgAdmin
pgAdmin is the leading Open Source management tool, the world’s most advanced Open Source database. The pgAdmin package is a free and open-source graphical user interface (GUI) administration tool for PostgreSQL, which is supported on many computer platforms. pgAdmin 4 is designed to meet the needs of both novice and experienced Postgres users alike, providing a powerful graphical interface that simplifies the creation, maintenance, and use of database objects [wikipedia, pgAdmin documentation]. Here is the documentation.
Instead of pgcli which was a command line interface, we can use pgAdmin which is GUI-based and more convenient to work with the database.
We can use a docker image that contains both Postgres and pgadmin.
docker run -it \
-e PGADMIN_DEFAULT_EMAIL=admin@admin.com \
-e PGADMIN_DEFAULT_PASSWORD=root \
-p 8080:80 \
dpage/pgadmin4
And then go to this address in your browser: http://localhost:8080/ and use the email and password you used above to log in.
Then right-click on Servers in the left side of the page and then create > server.... Then in the General tab set a name and in the connection tab use localhost and root and root for the host, user, and password. But it doesn’t work and it cannot find Postgres in its localhost (it cannot see it because there is no connection between these two containers).
If we want to connect two containers of Postgres and pgAdmin to see each other, we need to put them in one network. Then pgAdmin will be able to connect to Postgres. We can create a network using docker network create <some-name for example pg-network> and then when we want to run each container, we need to tell it that this container needs to be run on this network using --network=pg-network flag. Also, we need to set the --name=<some-name for example pg-database/pgadmin> for the postgres/pgadmin container so that the pgAdmin/postgres can find it by name.
Then again log in to pgadmin and use pg-database name in the Host name/address in the connection tab of creating the server.
docker network create pg-network# terminal1
docker run -it \
-e POSTGRES_USER="root" \
-e POSTGRES_PASSWORD="****" \
-e POSTGRES_DB="ny_taxi" \
-v $(pwd)/ny_taxi_postgres_data:/var/lib/postgresql/data \
-p 5432:5432 \
--network=pg-network \
--name pg-database \
postgres:13#terminal2
docker run -it \
-e PGADMIN_DEFAULT_EMAIL="admin@admin.com" \
-e PGADMIN_DEFAULT_PASSWORD="root" \
-p 8080:80 \
--network=pg-network \
--name pgadmin \
dpage/pgadmin4Let’s run the container that we had for data ingestion on the network to ingest data into Postgres. Note that as we have downloaded the dataset and do not want to download it again (we can if we want by providing the URL from the website), we use python to make the address (folder in our local machine) that contains the CSV dataset as a server and download the CSV from that. For this, we can use the following python command in the folder address (week_1_basics_n_setup/2_docker_sql ):
python -m http.serverURL="http://http://192.168.43.156:8000/:8000/yellow_tripdata_2021-01.csv"
or
URL="https://s3.amazonaws.com/nyc-tlc/trip+data/yellow_tripdata_2021-01.csv"
docker run -it \
--network=pg-network \
taxi_ingest:v001 \
--user=root \
--password=root \
--host=pg-database \
--port=5432 \
--db=ny_taxi \
--table_name=yellow_taxi_trips \
--url=${URL}In the real world, instead of using this network (pg-network) and host (pg-databse), we will have a database in the cloud and a URL to that database that can be used for the connection. Also, instead of docker, this data ingestion can be done using Kubernetes or airflow. We will see how to do it using airflow, but not Kubernetes in the next weeks.
Now let’s use docker-compose and put everything in one YAML file instead of creating a network and running two containers in two terminals. Install docker-compose from here.
Then we can create a docker-compose.yaml file:
services:
  pgdatabase:
    image: postgres:13
    environment:
      - POSTGRES_USER=root
      - POSTGRES_PASSWORD=****
      - POSTGRES_DB=ny_taxi
    volumes:
      - "./ny_taxi_postgres_data:/var/lib/postgresql/data:rw"
    ports:
      - "5432:5432"
  pgadmin:
    image: dpage/pgadmin4
    environment:
      - PGADMIN_DEFAULT_EMAIL=admin@admin.com
      - PGADMIN_DEFAULT_PASSWORD=root
    ports:
      - "8080:80"
And then:
docker-compose up -dCheck the following video for more explanation on docker-compose, network, and ports:
This will run two dockers on a network and we do not need to create a separate network. Note that the network created automatically by docker-compose has changed (2_docker_sql_default) and also the hostname (pgdatabase). You can find the network name by docker network ls command.
URL="http://192.168.43.156:8000/yellow_tripdata_2021-01.csv"
or
URL="https://s3.amazonaws.com/nyc-tlc/trip+data/yellow_tripdata_2021-01.csv"

docker run -it \
  --network=2_docker_sql_default \
  taxi_ingest:v001 \
    --user=root \
    --password=root \
    --host=pgdatabase \
    --port=5432 \
    --db=ny_taxi \
    --table_name=yellow_taxi_trips \
    --url=${URL}
Then we can go to localhost:8080 and create a server with a name like localDocker and connections info: host:pgdatabase, username:root, password:root. The table is in databases > ny_taxi > schemas > tables > yellow_taxi_trips.
Terraform
In this section, we will go for an introduction to Terraform and how to set up GCP infrastructure using Terraform.
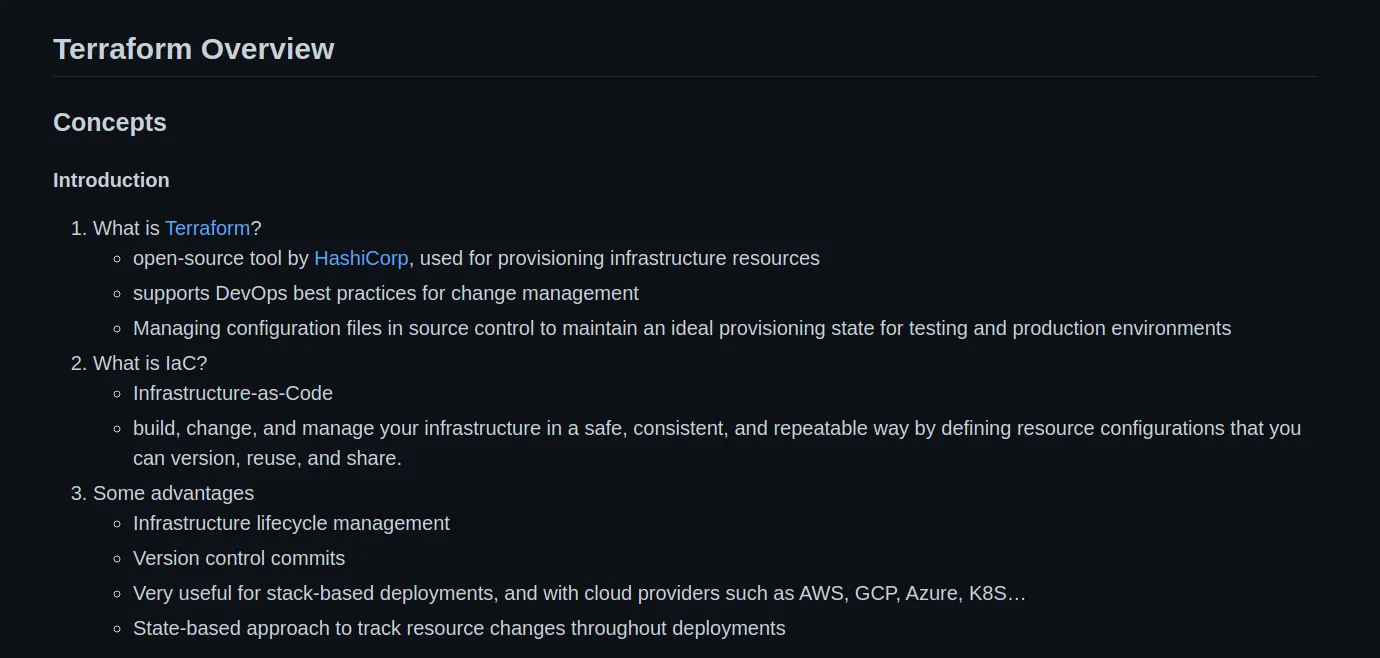
Terraform is an infrastructure as code (IaC) tool that allows you to build, change, and version infrastructure safely and efficiently. This includes low-level components such as compute instances, storage, and networking, as well as high-level components such as DNS entries, SaaS features, etc. Terraform can manage both existing service providers and custom in-house solutions [ terraform docs].
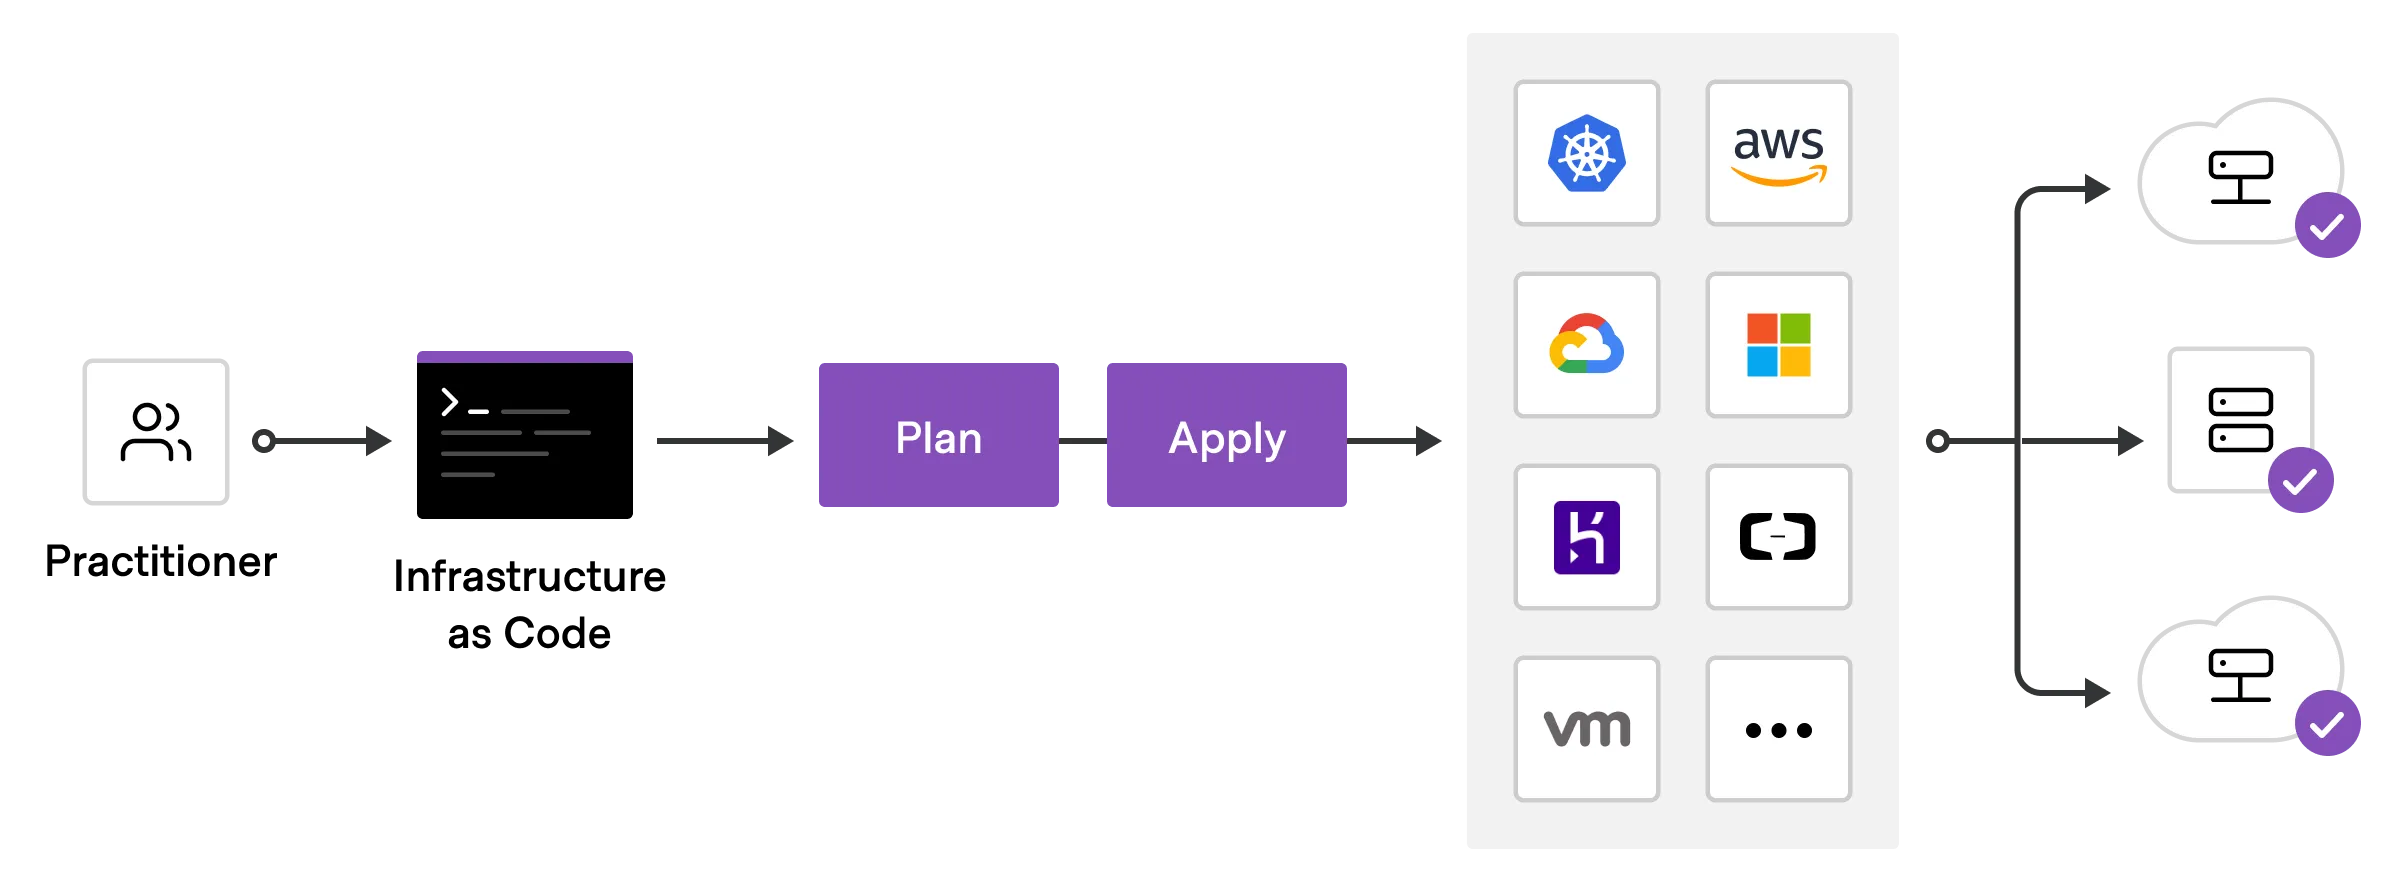
To deploy infrastructure with Terraform [ terraform docs]:
- Scope — Identify the infrastructure for your project.
- Author — Write the configuration for your infrastructure.
- Initialize — Install the plugins Terraform needs to manage the infrastructure.
- Plan — Preview the changes Terraform will make to match your configuration.
- Apply — Make the planned changes.
We need to first install Terraform client from this link based on your OS type.
After setting up your GCP account, you need to create a project (follow the video). Then you need to create a service account from IAM & Admin > Services > Create service account and then fill in the name and other stuff to create it. Then grant Viewer role, to begin with.
A service account is a special kind of account used by an application or compute workload, such as a Compute Engine virtual machine (VM) instance, rather than a person. Applications use service accounts to make authorized API calls, authorized as either the service account itself or as Google Workspace or Cloud Identity users through domain-wide delegation. For example, a service account can be attached to a Compute Engine VM, so that applications running on that VM can authenticate as the service account. In addition, the service account can be granted IAM roles that let it access resources. The service account is used as the identity of the application, and the service account’s roles control which resources the application can access. A service account is identified by its email address, which is unique to the account [ GCP docs].
After creating the service account, click on the three dots in front of it and then manage keys > add key> create a new key > json. You can download and save the key on your machine.
Then you need Google SDK which is a CLI tool for you to interact with google cloud services. Cloud SDK is a set of tools that you can use to manage resources and applications hosted on Google Cloud. These tools include the gcloud, gsutil, and bq command-line tools [ gcp docs].
You can install the SDK by following the instructions here.
To test if it is installed correctly, you can use the gcloud -v command:
isaac@isaac ~ $ gcloud -v

Google Cloud SDK 369.0.0
alpha 2022.01.14
beta 2022.01.14
bq 2.0.72
core 2022.01.14
gsutil 5.6
Then set the environment variable to point to your downloaded GCP keys:
export GOOGLE_APPLICATION_CREDENTIALS=<path/to/your/service-account-authkeys>.json

# Refresh token, and verify authentication
gcloud auth application-default login
Let’s now create the infrastructure for our project in GCP:
- Google Cloud Storage (GCS): Data Lake
- BigQuery: Data Warehouse
A data lake is a centralized repository designed to store, process, and secure large amounts of structured, semi-structured, and unstructured data. It can store data in its native format and process any variety of it, ignoring size limits [ gcp docs].
A data lake provides a scalable and secure platform that allows enterprises to ingest any data from any system at any speed — even if the data comes from on-premises, cloud, or edge-computing systems; store any type or volume of data in full fidelity; process data in real-time or batch mode; and analyze data using SQL, Python, R, or any other language, third-party data, or analytics application [ gcp docs].
Today’s enterprises rely on the effective collection, storage, and integration of data from disparate sources for analysis and insights. These data analytics activities have moved to the heart of revenue generation, cost containment, and profit optimization. As such, it’s no surprise that the amounts of data generated and analyzed, as well as the number and types of data sources, have exploded. Data-driven companies require robust solutions for managing and analyzing large quantities of data across their organizations. These systems must be scalable, reliable, and secure enough for regulated industries, as well as flexible enough to support a wide variety of data types and use cases. The requirements go way beyond the capabilities of any traditional database. That’s where the data warehouse comes in. BigQuery is Google Cloud’s modern and serverless data warehousing solution [ gcp docs].
A data warehouse is an enterprise system used for the analysis and reporting of structured and semi-structured data from multiple sources, such as point-of-sale transactions, marketing automation, customer relationship management, and more. A data warehouse is suited for ad hoc analysis as well as custom reporting. A data warehouse can store both current and historical data in one place and is designed to give a long-range view of data over time, making it a primary component of business intelligence [ gcp docs].
More explanations about GCS and BigQuery will come in the next lectures.
Now let’s add permissions for our service account. From IAM & Admin > IAM in the Permissions tab select the permission we created and edit it. In order to give Terraform access to go and create buckets and objects in GCS, we need to add two new roles called storage admin and storage object admin. Note that in production you may want to create custom rules to limit the access and not use Admin version which gives full access. The ideal case would be to create one service account for Terrafrom and assign its permissions, and then a different service for the data pipeline with its own permissions.
In addition to the above two roles, we need to add BigQuery admin too for BigQuery to be able to interact with GCS.
We also need to enable APIs. The idea is that when the local environment interacts with the cloud environment, it doesn’t interact directly with the resource. These APIs are the enablers of this communication. We need to enable these APIs for our project:
Here is the main.tf file (check here to learn about different parts and how to write the config file):
terraform {
  required_version = ">= 1.0"
  backend "local" {}  # Can change from "local" to "gcs" (for google) or "s3" (for aws), if you would like to preserve your tf-state online
  required_providers {
    google = {
      source  = "hashicorp/google"
    }
  }
}

provider "google" {
  project = var.project
  region = var.region
  // credentials = file(var.credentials)  # Use this if you do not want to set env-var GOOGLE_APPLICATION_CREDENTIALS
}

# Data Lake Bucket
# Ref: https://registry.terraform.io/providers/hashicorp/google/latest/docs/resources/storage_bucket
resource "google_storage_bucket" "data-lake-bucket" {
  name          = "${local.data_lake_bucket}_${var.project}" # Concatenating DL bucket & Project name for unique naming
  location      = var.region

# Optional, but recommended settings:
  storage_class = var.storage_class
  uniform_bucket_level_access = true

versioning {
    enabled     = true
  }

lifecycle_rule {
    action {
      type = "Delete"
    }
    condition {
      age = 30  // days
    }
  }

  force_destroy = true
}

# DWH
# Ref: https://registry.terraform.io/providers/hashicorp/google/latest/docs/resources/bigquery_dataset
resource "google_bigquery_dataset" "dataset" {
  dataset_id = var.BQ_DATASET
  project    = var.project
  location   = var.region
}
And the variables.tf is as follows:
locals {
  data_lake_bucket = "dtc_data_lake"
}

variable "project" {
  description = "Your GCP Project ID"
  type = string
}

variable "region" {
  description = "Region for GCP resources. Choose as per your location: https://cloud.google.com/about/locations"
  default = "europe-west6"
  type = string
}

variable "storage_class" {
  description = "Storage class type for your bucket. Check official docs for more info."
  default = "STANDARD"
}

variable "BQ_DATASET" {
  description = "BigQuery Dataset that raw data (from GCS) will be written to"
  type = string
  default = "trips_data_all"
}
We can then do the following commands for terraform:
1. `terraform init`:
    * Initializes & configures the backend, installs plugins/providers, & checks out an existing configuration from a version control
2. `terraform plan`:
    * Matches/preview slocal changes against a remote state, and proposes an Execution Plan.
3. `terraform apply`:
    * Asks for approval to the proposed plan, and applies changes to cloud
4. `terraform destroy`
    * Removes your stack from the Cloud
That’s it for this week. The following video shows how to create a VM instance, add an ssh key and connect to it, install Docker and docker-compose, run pgAdmin and Postgres on the VM, connect to the database from our local machine, and how to install Terraform and do initialization.
To refresh your SQL knowledge, check the following videos:
The questions for homework can be found here. The following video shows the solution:
You can also learn more about Terraform here:
That’s it for this week. We’ll continue next week :)
Work with Nazmi
Have a problem like this to ship?
The two-week AI Opportunity Audit turns it into a prioritized map, a 90-day roadmap, and one build-ready spec — a fixed-fee first step.
See the AI Opportunity Audit or book a 20-minute call →