
Data Engineering: Week 1: Introduction and Prerequisites
 Isaac Kargar7 min read
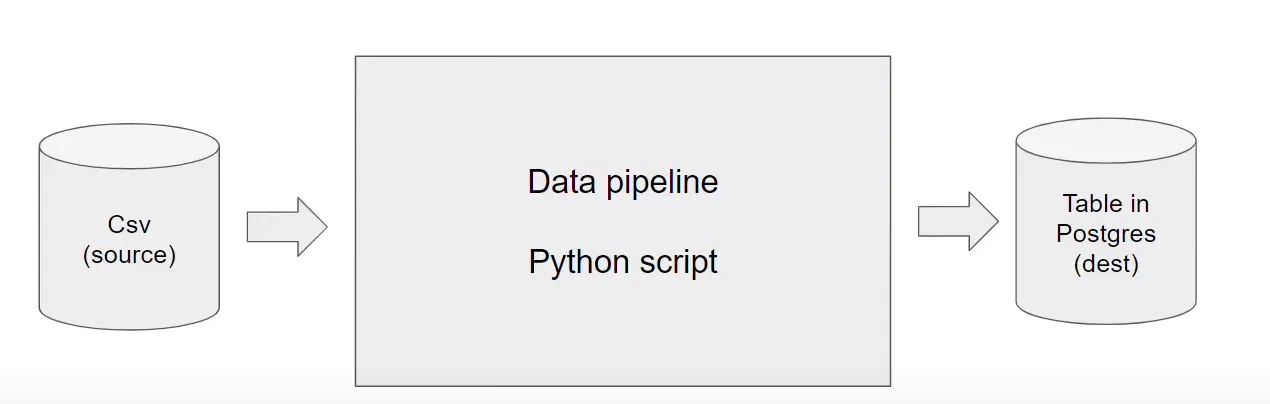
Week 1 of the Data Engineering Zoomcamp prepares a small pipeline around the NYC Taxi and Limousine Commission trip-record dataset. We will download a file, process it in chunks, load it into Postgres, and later move the same data into Google Cloud Storage and BigQuery.
The course
The course architecture looks like this:
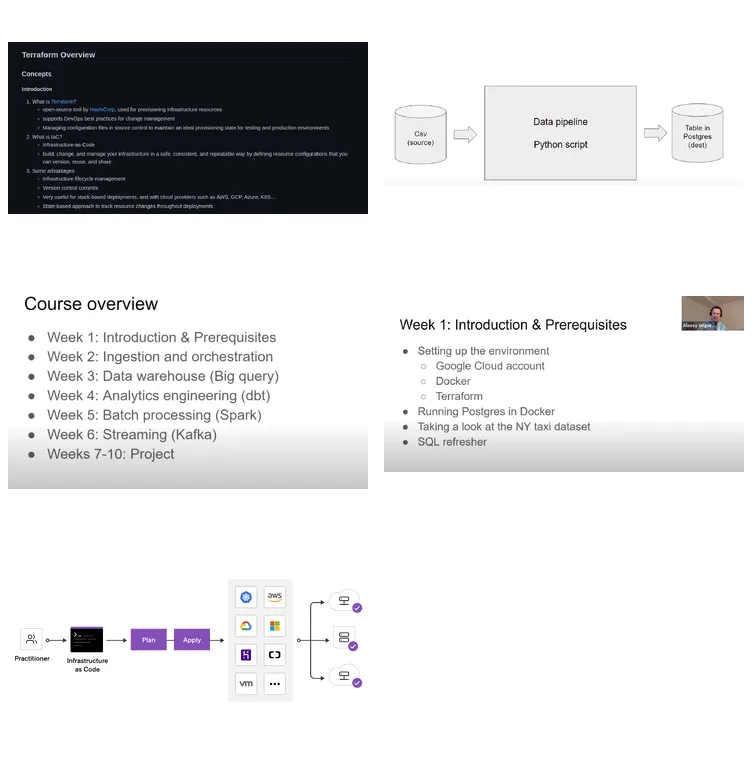
The batch path places raw data in Google Cloud Storage, loads it into BigQuery, and then applies SQL and transformation tools. Later material also models events as a stream and introduces Kafka. Each component has a different responsibility:
- Google Cloud Platform (GCP): cloud infrastructure and managed services
- Google Cloud Storage (GCS): object storage commonly used as a data lake
- BigQuery: managed analytical warehouse
- Terraform: infrastructure as code
- Docker: reproducible application environments
- SQL: data analysis and exploration
- Airflow: workflow orchestration
- dbt: warehouse transformations
- Spark: distributed processing
- Kafka: event streaming
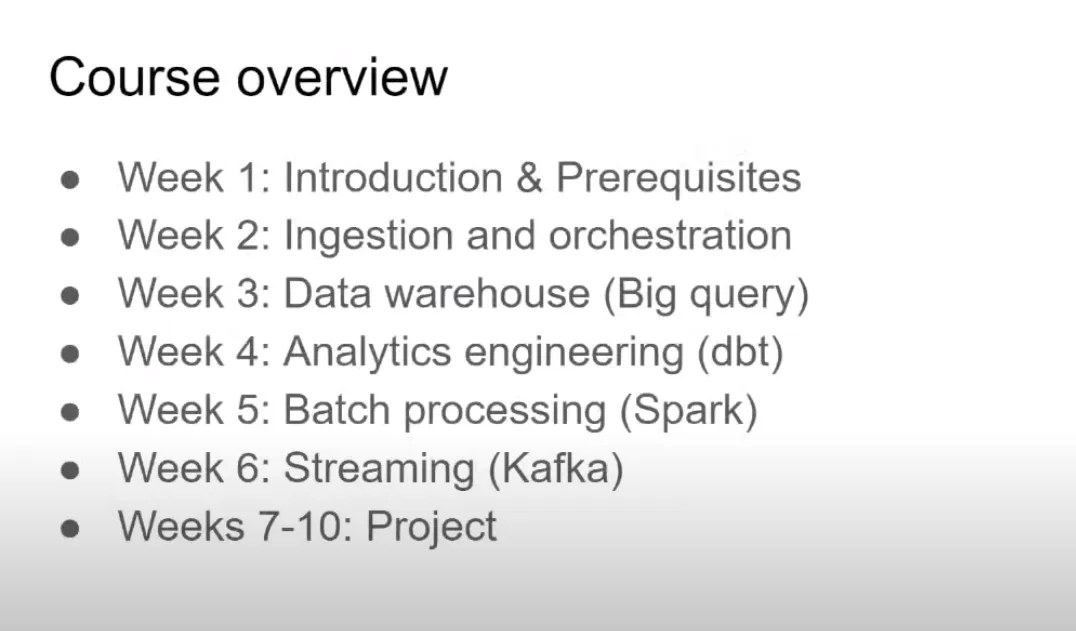
The course repository contains the exercises and the course playlist contains the lectures. Week 1 covers the following topics:
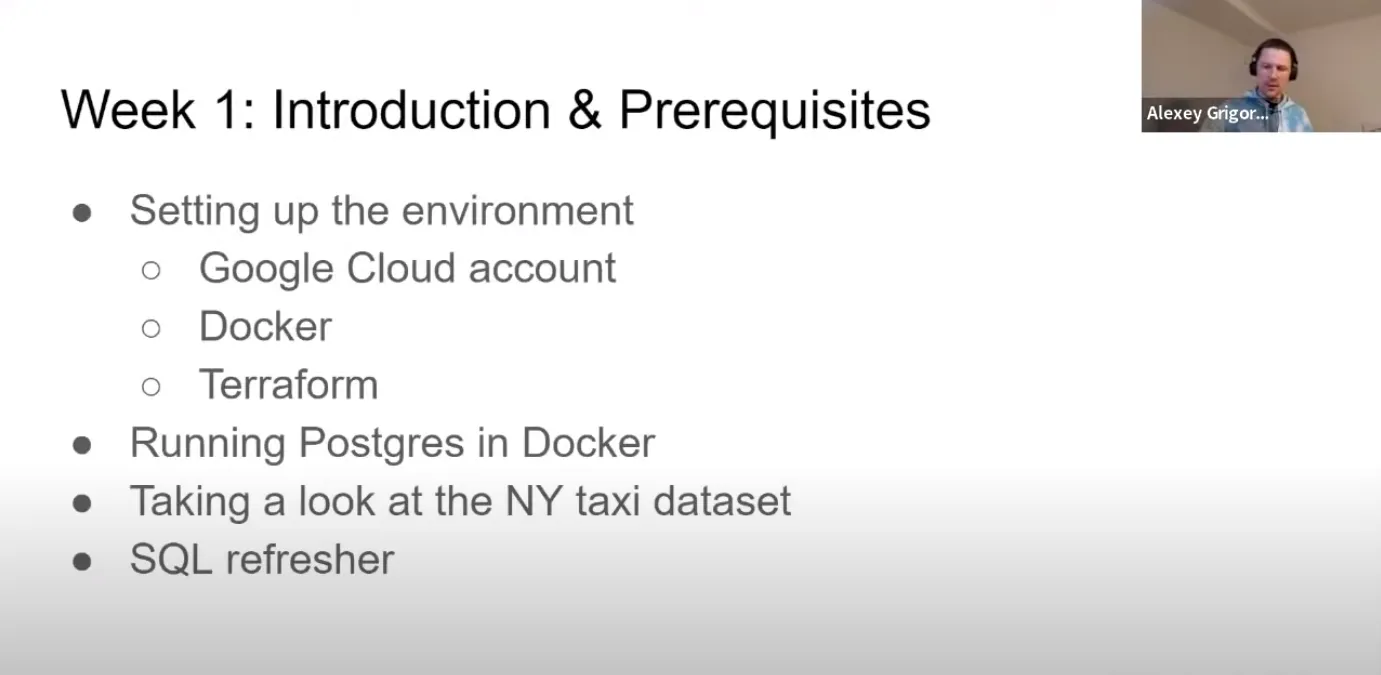
Google Cloud Platform
GCP provides the storage, warehouse, compute, and identity services used later in the course.
Create a project only if you need one. Billing and promotional credits depend on the account and the current Google Cloud offer, so check the Google Cloud pricing and free-program pages before creating billable resources. The examples below use placeholders for a project and region.
Docker
Docker packages an application and its dependencies in an image. A container runs that image with an isolated filesystem and network namespace. Containers can communicate through explicit ports and networks.
The small pipeline below accepts a day as an argument:
# pipeline.py
import sys

import pandas as pd

day = sys.argv[1]
frame = pd.DataFrame({"day": [day]})
print(frame)
print(f"job finished successfully for day = {day}")
Put the installation and filesystem instructions on their own lines in the Dockerfile:
FROM python:3.12-slim

WORKDIR /app
COPY requirements.txt .
RUN pip install --no-cache-dir -r requirements.txt

COPY pipeline.py .
ENTRYPOINT ["python", "pipeline.py"]
The requirements file contains only what the script imports:
pandas==2.2.3Build and run it:
docker build --tag taxi-pipeline:dev .
docker run --rm taxi-pipeline:dev 2024-01-01
A tag identifies the image for local use. For a team, publish an immutable image digest through the normal registry release process.
PostgreSQL
PostgreSQL, usually called Postgres, is a relational database with SQL transactions, indexes, constraints, and extensions. Run it as a separate service from the application that loads it.
For a local exercise, mount a persistent data directory and pass the password through an environment variable:
export POSTGRES_PASSWORD="choose-a-local-password"

docker run --name taxi-postgres --detach \
  --env POSTGRES_USER=taxi \
  --env POSTGRES_PASSWORD="$POSTGRES_PASSWORD" \
  --env POSTGRES_DB=ny_taxi \
  --volume "$(pwd)/ny_taxi_postgres_data:/var/lib/postgresql/data" \
  --publish 5432:5432 \
  postgres:16
Download the January 2021 CSV archive from the course dataset release. The TLC data page distributes current files as Parquet; this exercise uses the archived CSV to demonstrate chunked ingestion.
curl --fail --location --output yellow_tripdata_2021-01.csv.gz \
  "https://github.com/DataTalksClub/nyc-tlc-data/releases/download/yellow/yellow_tripdata_2021-01.csv.gz"
Set POSTGRES_URL to the local database connection string. A chunked reader decompresses the archive while keeping the whole CSV out of memory:
import os

import pandas as pd
from sqlalchemy import create_engine


engine = create_engine(os.environ["POSTGRES_URL"])
rows = pd.read_csv("yellow_tripdata_2021-01.csv.gz", chunksize=100_000)

for chunk_number, frame in enumerate(rows):
    frame["tpep_pickup_datetime"] = pd.to_datetime(
        frame["tpep_pickup_datetime"],
        errors="raise",
    )
    frame["tpep_dropoff_datetime"] = pd.to_datetime(
        frame["tpep_dropoff_datetime"],
        errors="raise",
    )
    frame.to_sql(
        name="yellow_taxi_data",
        con=engine,
        if_exists="replace" if chunk_number == 0 else "append",
        index=False,
    )
For the local container above, set POSTGRES_URL to a value such as postgresql+psycopg2://taxi:
Install pgcli if you prefer a terminal client:
python -m pip install pgcli
pgcli --host localhost --port 5432 --user taxi --database ny_taxi
The \dt command lists tables and \d yellow_taxi_data shows the inferred schema. A query such as the following checks the date range and maximum fare in the loaded data:
SELECT
  MIN(tpep_pickup_datetime) AS first_pickup,
  MAX(tpep_pickup_datetime) AS last_pickup,
  MAX(total_amount) AS largest_total
FROM yellow_taxi_data;
The exact values depend on the file version and on whether invalid rows were filtered, so query the table after loading it.
A complete ingestion script
The next script downloads a CSV or gzip-compressed CSV with an argument-based subprocess call and fails clearly when the source cannot be fetched. It then processes chunks until the iterator is exhausted.
#!/usr/bin/env python3

import argparse
import os
import subprocess
from pathlib import Path
from urllib.parse import urlparse

import pandas as pd
from sqlalchemy import create_engine


def download(url: str, destination: Path) -> None:
    result = subprocess.run(
        [
            "curl",
            "--fail",
            "--location",
            "--silent",
            "--show-error",
            "--output",
            str(destination),
            url,
        ],
        check=False,
        capture_output=True,
        text=True,
    )
    if result.returncode != 0:
        raise RuntimeError(
            f"download failed with exit code {result.returncode}: "
            f"{result.stderr.strip()}"
        )


def ingest(args: argparse.Namespace) -> None:
    suffix = ".csv.gz" if urlparse(args.url).path.endswith(".gz") else ".csv"
    csv_path = Path("yellow_tripdata" + suffix)
    download(args.url, csv_path)

    engine = create_engine(os.environ["POSTGRES_URL"])
    chunks = pd.read_csv(csv_path, chunksize=args.chunk_size)

    for chunk_number, frame in enumerate(chunks):
        for column in ("tpep_pickup_datetime", "tpep_dropoff_datetime"):
            frame[column] = pd.to_datetime(frame[column], errors="raise")

        frame.to_sql(
            name=args.table_name,
            con=engine,
            if_exists="replace" if chunk_number == 0 else "append",
            index=False,
        )
        print(f"inserted chunk {chunk_number + 1}")


if __name__ == "__main__":
    parser = argparse.ArgumentParser()
    parser.add_argument("--url", required=True)
    parser.add_argument("--table-name", default="yellow_taxi_data")
    parser.add_argument("--chunk-size", type=int, default=100_000)
    ingest(parser.parse_args())
The Docker image installs the system download tool and the Python dependencies explicitly:
FROM python:3.12-slim

RUN apt-get update \
    && apt-get install --yes --no-install-recommends curl \
    && rm -rf /var/lib/apt/lists/*

WORKDIR /app
COPY requirements.txt .
RUN pip install --no-cache-dir -r requirements.txt
COPY ingest_data.py .

ENTRYPOINT ["python", "ingest_data.py"]
The requirements file is:
pandas==2.2.3
sqlalchemy==2.0.36
psycopg2-binary==2.9.10
Build it and pass the database URL at runtime:
docker build --tag taxi-ingest:dev .
docker run --rm \
  --env POSTGRES_URL="postgresql+psycopg2://taxi:<password>@host.docker.internal:5432/ny_taxi" \
  taxi-ingest:dev \
  --url "https://github.com/DataTalksClub/nyc-tlc-data/releases/download/yellow/yellow_tripdata_2021-01.csv.gz"
The host name above is for Docker Desktop. On a Linux installation, use a database hostname reachable from the container or add the appropriate host-gateway mapping. A container must be able to resolve the database address.
pgAdmin
pgAdmin is an open-source administration interface for Postgres. It is a separate application and container. Postgres stores the data; pgAdmin connects to it and provides a browser UI. Read the pgAdmin documentation for the supported image and configuration options.
A Compose file keeps the two services on one network and avoids the port collision with an Airflow UI by publishing pgAdmin on port 8081:
services:
  pgdatabase:
    image: postgres:16
    environment:
      POSTGRES_USER: taxi
      POSTGRES_PASSWORD: ${POSTGRES_PASSWORD:?set POSTGRES_PASSWORD}
      POSTGRES_DB: ny_taxi
    volumes:
      - taxi-postgres:/var/lib/postgresql/data
    ports:
      - "5432:5432"

  pgadmin:
    image: dpage/pgadmin4:9
    environment:
      PGADMIN_DEFAULT_EMAIL: ${PGADMIN_EMAIL:?set PGADMIN_EMAIL}
      PGADMIN_DEFAULT_PASSWORD: ${PGADMIN_PASSWORD:?set PGADMIN_PASSWORD}
    ports:
      - "8081:80"
    depends_on:
      - pgdatabase

volumes:
  taxi-postgres:
Set the three variables in the Compose .env file, run docker compose up —detach, and visit http://localhost:8081. In pgAdmin’s connection form, use host pgdatabase, port 5432, database ny_taxi, and the Postgres credentials. From a host process, use localhost:5432.
A Compose network uses service names as DNS names. The ingestion container can join this Compose project and use pgdatabase as its host:
docker compose up --detach
docker run --rm --network "$(basename "$PWD")_default" \
  --env POSTGRES_URL="postgresql+psycopg2://taxi:<password>@pgdatabase:5432/ny_taxi" \
  taxi-ingest:dev \
  --url "https://github.com/DataTalksClub/nyc-tlc-data/releases/download/yellow/yellow_tripdata_2021-01.csv.gz"
If the generated network name differs, run docker network ls and pass the actual project network. In a larger application, place the ingestion service in the same Compose file and let Compose manage the network.
Terraform and Google Cloud prerequisites
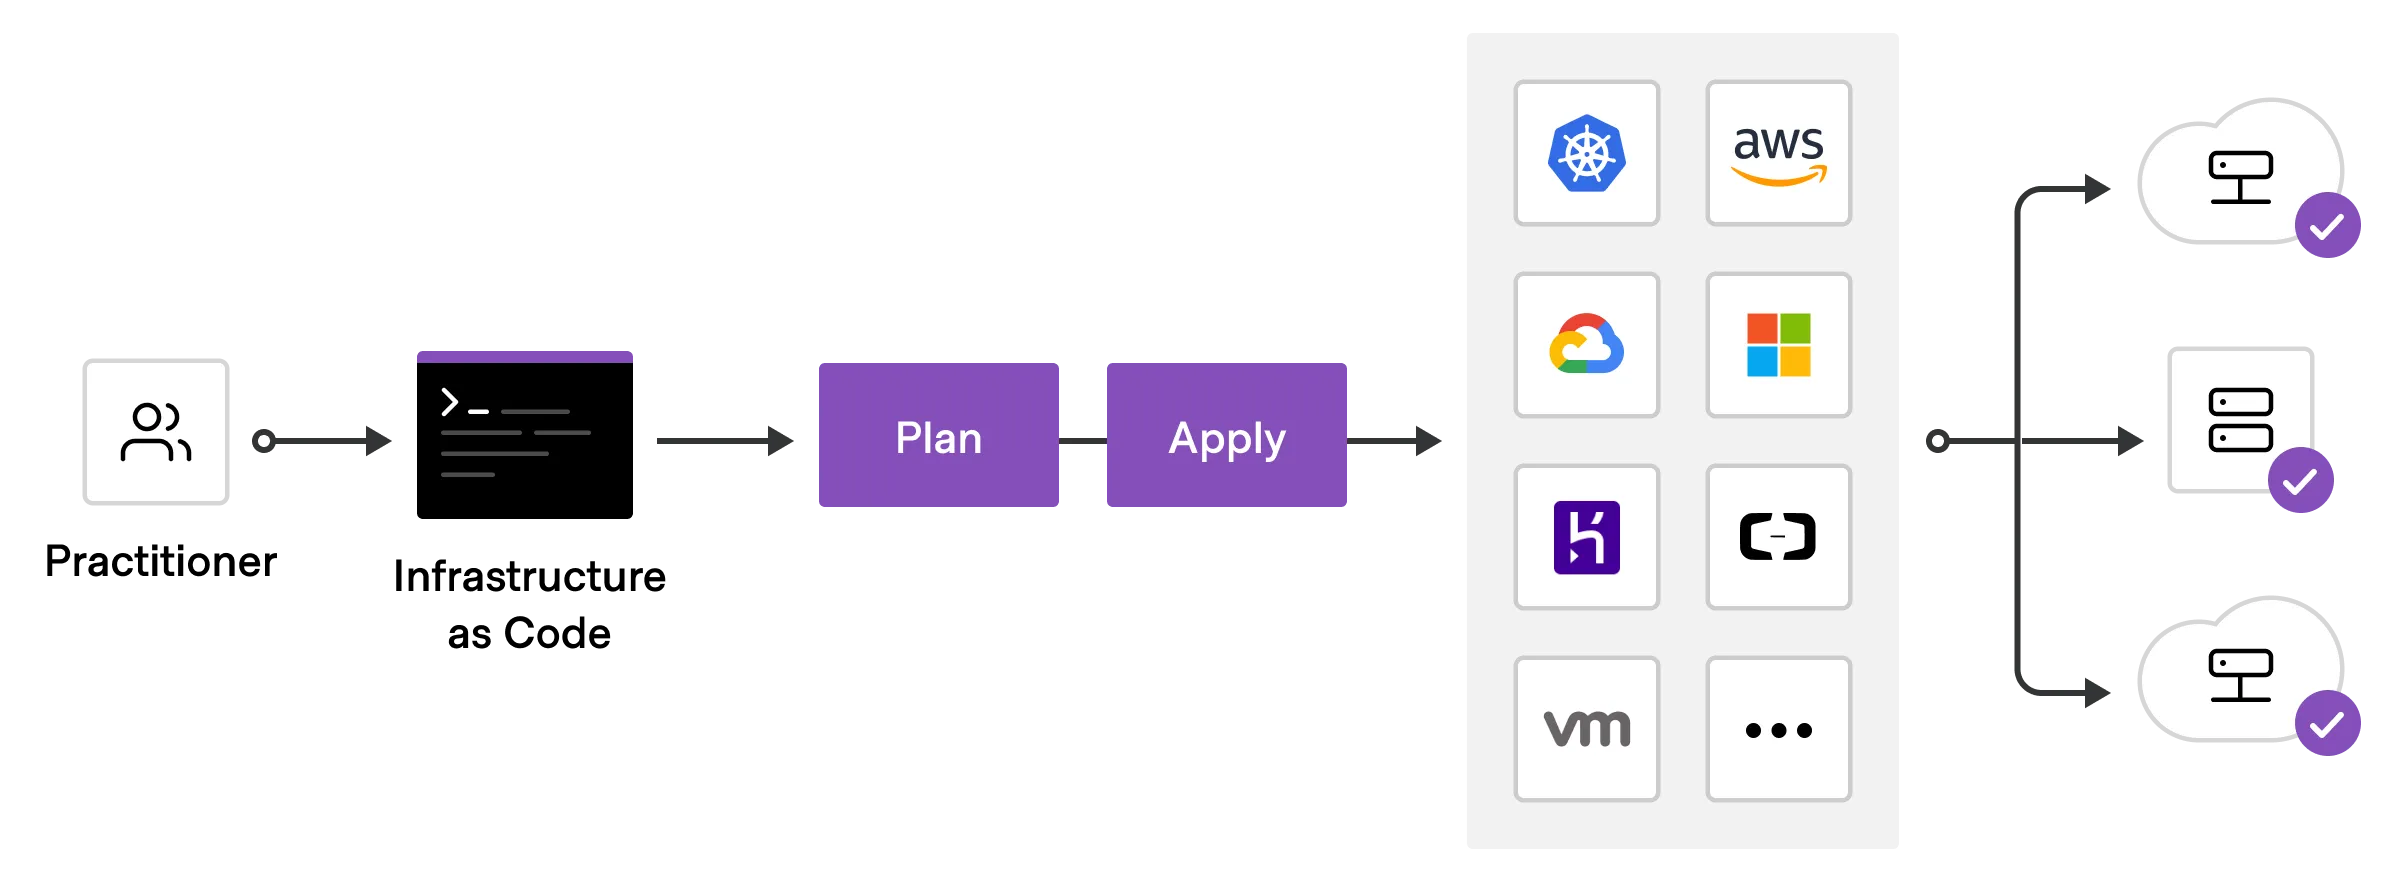
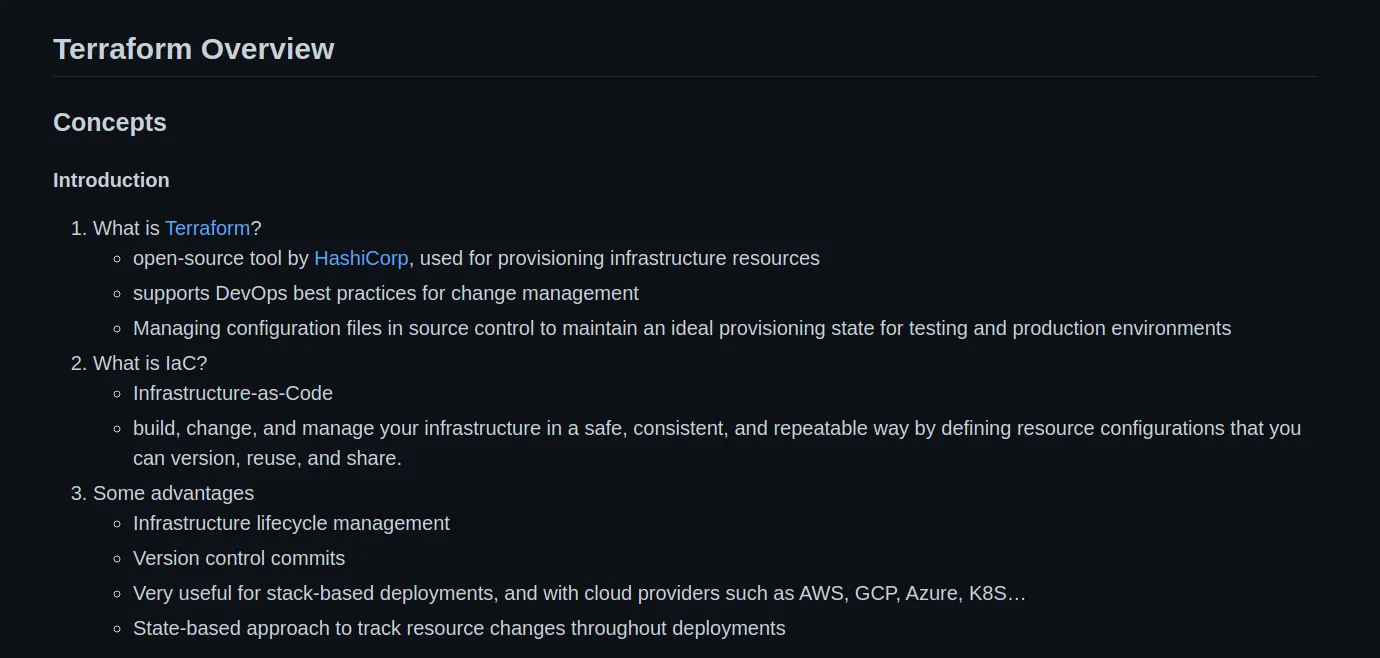
Terraform describes infrastructure as code. It can create a bucket and a BigQuery dataset from a reviewable configuration, then show a plan before applying it. The Terraform Google provider documentation and the Google Cloud setup guide document the current provider workflow.
Use Application Default Credentials for local development:
gcloud auth application-default login
export TF_VAR_project_id="YOUR_GCP_PROJECT"
gcloud config set project "$TF_VAR_project_id"
terraform init
terraform fmt -check
terraform validate
terraform plan
A workload running in Google Cloud should use an attached service account with the minimum roles required by the resources it manages. A service-account key file is not required for this workflow; keep credentials in the platform’s identity path. See Google authentication for Terraform for alternatives.
The following configuration creates one bucket and one dataset. allow_destroy defaults to false so a normal plan does not make the bucket delete its objects.
terraform {
  required_version = ">= 1.6.0"

  required_providers {
    google = {
      source  = "hashicorp/google"
      version = ">= 6.0, < 8.0"
    }
  }
}

provider "google" {
  project = var.project_id
  region  = var.region
}

resource "google_storage_bucket" "data_lake" {
  name                        = "${var.project_id}-data-lake"
  location                    = var.region
  storage_class               = "STANDARD"
  uniform_bucket_level_access = true

  versioning {
    enabled = true
  }

  force_destroy = var.allow_destroy
}

resource "google_bigquery_dataset" "warehouse" {
  dataset_id = var.dataset_id
  project    = var.project_id
  location   = var.region
}
The variables are explicit and can be provided through Terraform’s TF_VAR_ environment convention:
variable "project_id" {
  description = "Google Cloud project ID"
  type        = string
}

variable "region" {
  description = "Region for the bucket and dataset"
  type        = string
  default     = "europe-west1"
}

variable "dataset_id" {
  description = "BigQuery dataset ID"
  type        = string
  default     = "trips_data_all"
}

variable "allow_destroy" {
  description = "Allow Terraform to delete objects when destroying the bucket"
  type        = bool
  default     = false
}
Run terraform apply only after reviewing the plan. The following video shows the VM and SSH setup used in the course:
To refresh SQL, see the current Module 1 homework and its solution:
Cleanup
Destroying infrastructure is a separate, destructive operation. Review the plan and run it only when the resources should be removed:
terraform plan -destroy
terraform destroy
If a bucket contains objects, allow_destroy must be enabled for that operation or the objects must be removed through the bucket’s lifecycle process. Local Docker data can be removed with docker compose down —volumes when the database contents are no longer needed.
Work with Nazmi
Build your AI system with Nazmi.
Tell us what you are building, what exists today, and where your team needs help.
Start a conversation or book a 20-minute call →